Ikea Kallax Hack

We are still working on finishing my sons’ new joint room and today I will share with you our fun bookshelves we “hacked” to make them our own.
My husband and I are DIYers normally. We like to build things on our own to have a custom look in our home. I said we LIKE to…but lately it’s become a rarity when we get the chance. Three boys will do that to you! I beg my husband to build something, but then beg him to come in out of the garage to help with the kids. One day I’ll get my custom made furniture maker back in action, but until then thank goodness for Ikea! The furniture is modern looking but cheap enough that we can mess around with the basic product to make it all our own! We’ve d0ne it with almost every piece of bought furniture in our home. We don’t usually keep it as it comes, we make it all our own style somehow.
When we needed storage for the boys’ room, I had grandiose dreams of a custom shelving and drawer system, but my husband and I decided to save our sanity and buy this time. We picked up the white 4×4 Kallax system at Ikea and brought it home to fancy it up.
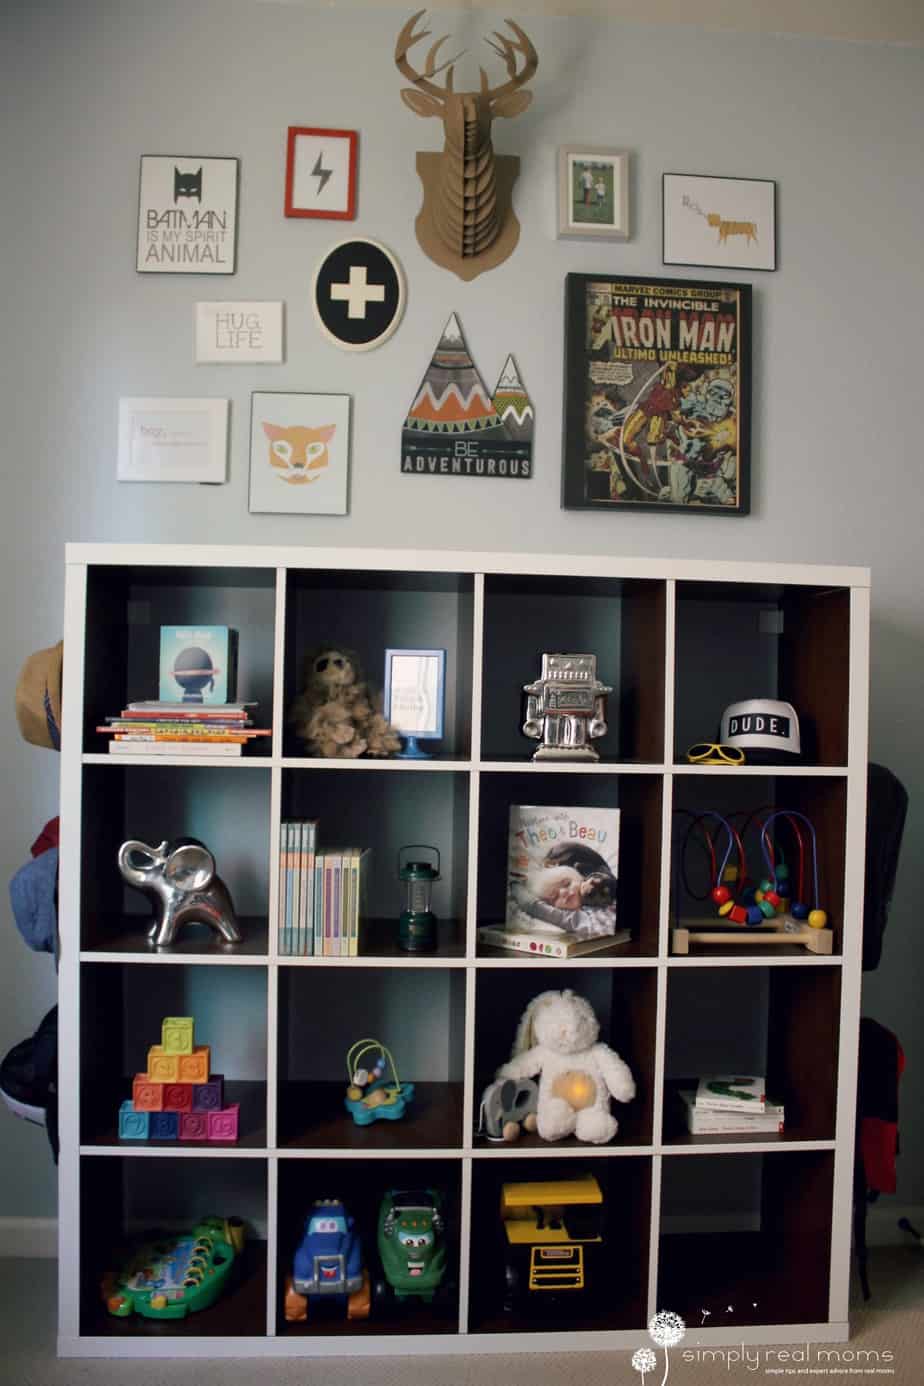
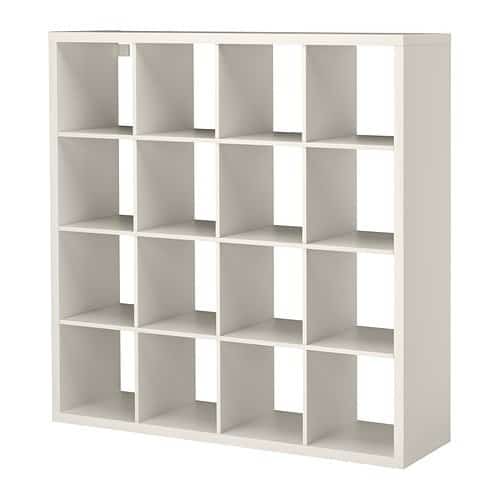 See? It’s cute! Here was my issue (feel free to roll your eyes at my craziness): The boys’ bed is a walnut stained wood and their dresser is white. I needed this piece to balance the two out and bring it all together. Being just white would make their bed look like it was an afterthought when in reality it was the first piece we chose for the room. (I told you I was crazy)
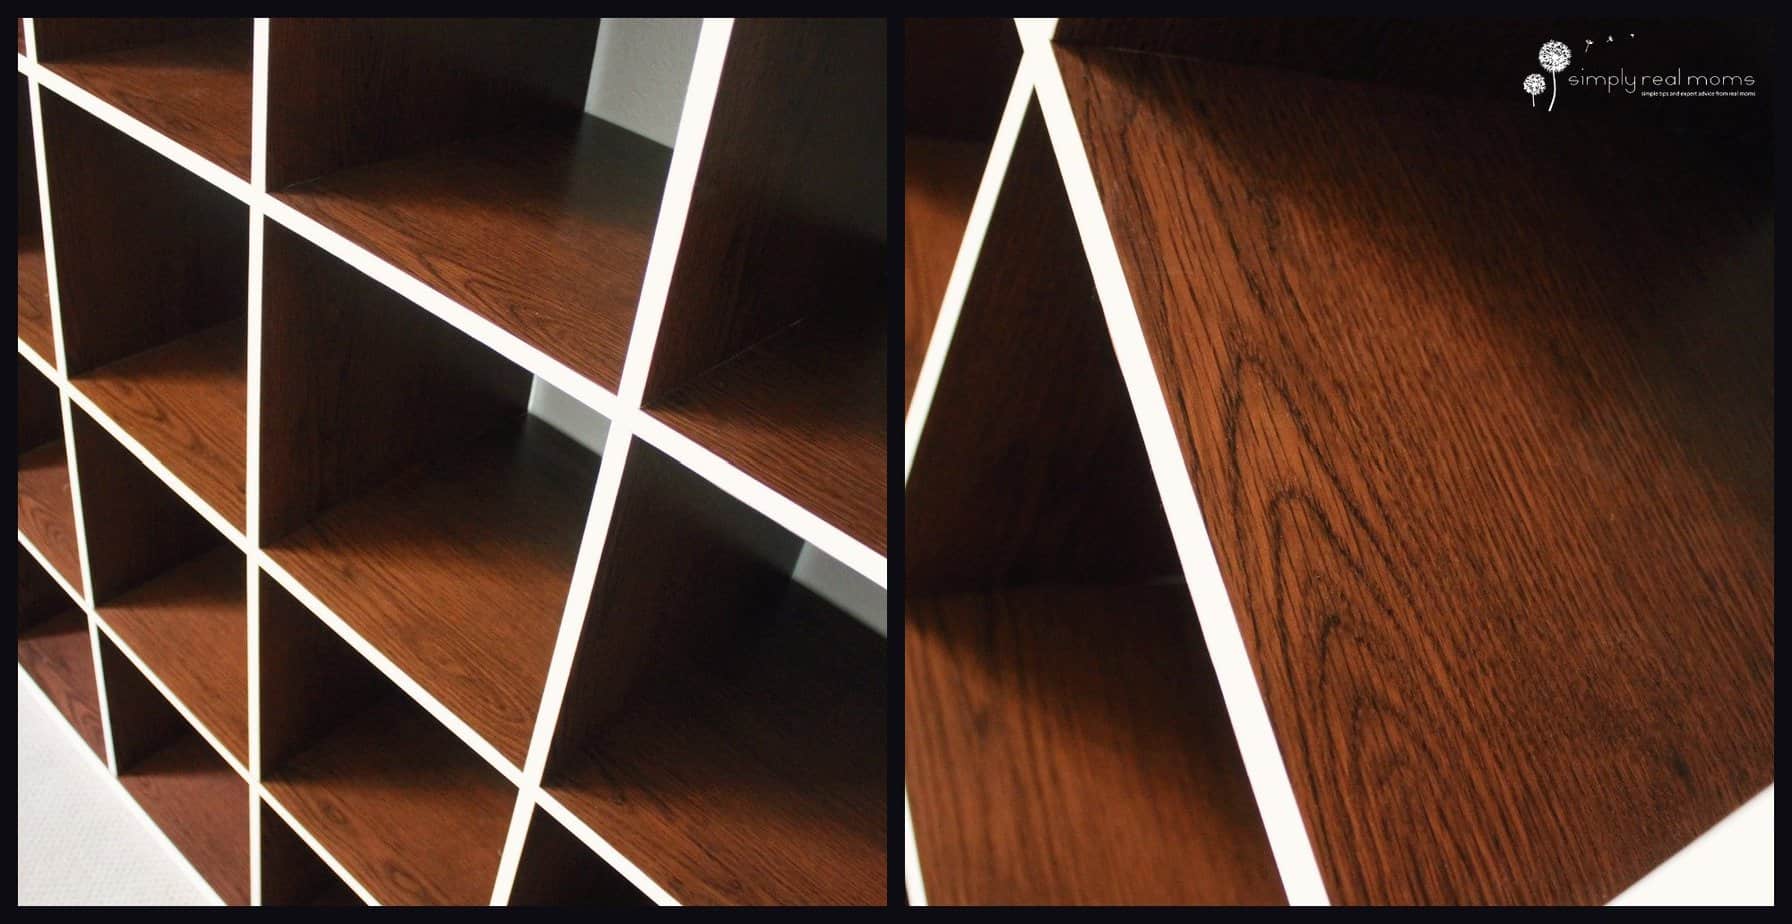
So I went and stocked up on some wood grain contact paper and I really impressed myself with the final product:

It’s got a fun mod feel to it but also brings the white and wood elements of the other furniture together to complete the room! The contact paper is amazing. It looks real, even up close!
Because this was a one time project I didn’t take step by step photos because I had to try a few techniques to figure out what worked best. Luckily, no pictures are necessary, I promise.
First Tip: Put the contact paper on before you build if possible. If yours is already built, think about taking it apart to add the wood grain. It is MUCH easier to add in larger sections.
Second Tip: Cut pieces out of the contact paper that are bigger than what you need. So if one of the walls is 58″x15″ and the contact paper is 18 inches wide, simply cut a piece of contact paper that is 60 inches long.
Third Tip: Use a credit card/gift card or Popsicle stick etc to smooth the bubbles in your contact paper once it’s applied.
Fourth Tip: Take a pair of scissors, open them slightly and trim the excess contact paper off by sliding the scissors against the boards.
To get this look, you’ll need to look at the included instructions and make sure you add the paper to all parts facing inward. You can use the wood grain design or any other contact paper to create your own look!
Once your contact paper is all applied and trimmed, construct the Kallax system following the instructions.
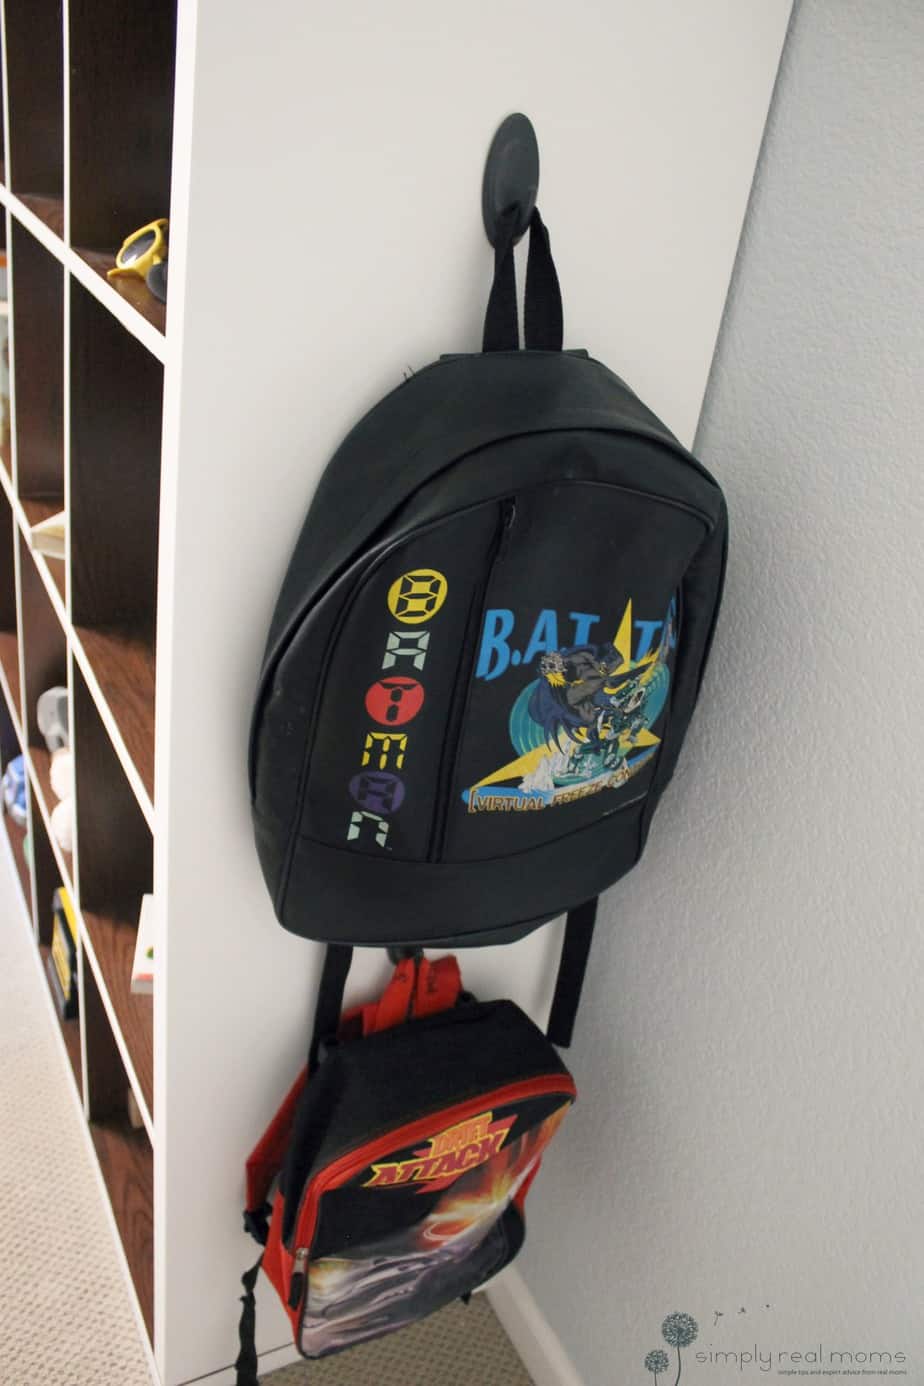
For extra storage we added command hooks to the sides of the shelving to hold hats 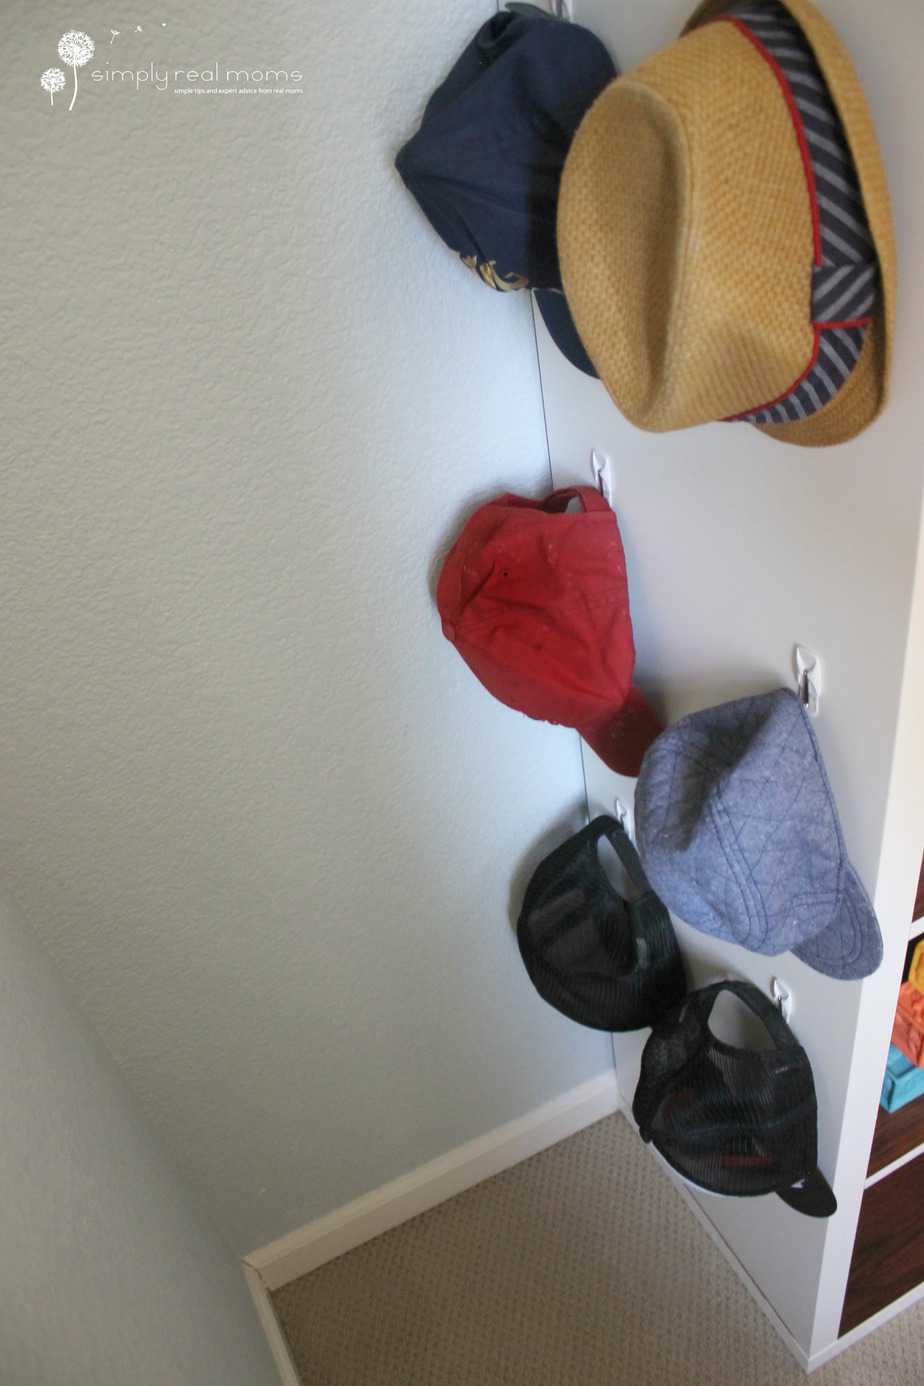 and backpacks
And now we have a gorgeous “custom” piece of furniture in the boys’ room that is perfectly functional and gives tons of space to store all their favorite books and toys for easy access
 You can find all the details of that gallery wall (along with free printables!) HERE
This took us a little over 3 rolls or the woodgrain Contact Paper to cover the 4×4 system. We bought the contact paper at Home Depot in the walnut color.
In total, this project took me 2 days to finish with 3 kids wreaking havoc on my house and having to stop to discipline and feed my boys. On your own I would guess it could be finished in one full day!
Make sure to keep up on the entire boys’ room makeover!
*We were not compensated to mention any of the above brands. The products were all purchased personally.