Snowmen Painted Glass Illuminaries

A friend on Facebook shared the neatest idea on making winter themed glass illuminaries to give as Christmas gifts. Of course… Facebook being Facebook, I was unable to find that post to show you my inspiration.
However, I decided that one of my grandmas would love some snowmen painted glass illuminaries. So I got to work…
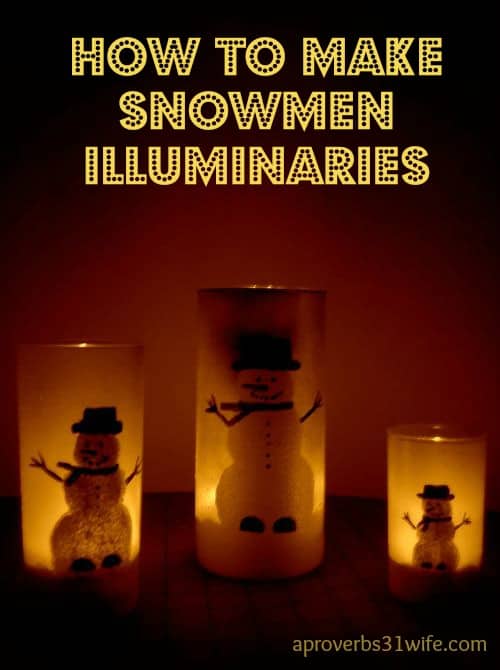
How to Make Snowmen Painted Glass Illuminaries
You will need:
- Clean vase or dinner glass
- Blue spray paint (I used Rustoleum brand)
- Brushes
- Sponge pouncer
- Paints -I used Folk art Multi-surface. White, Black, Orange, and color of choice for scarf
- Glitter glue
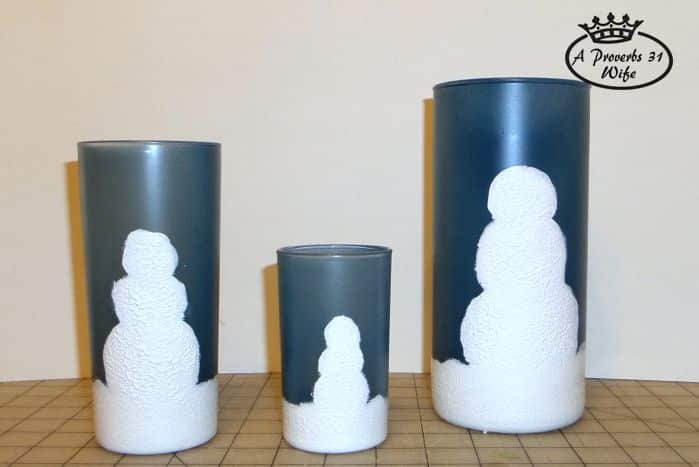
A trip to the local thrift store resulted in three different glasses that nested together. I think the largest one was actually a vase, but the other two were dinner glasses. In hindsight, the largest one, was really too big and didn’t illuminate near as well.
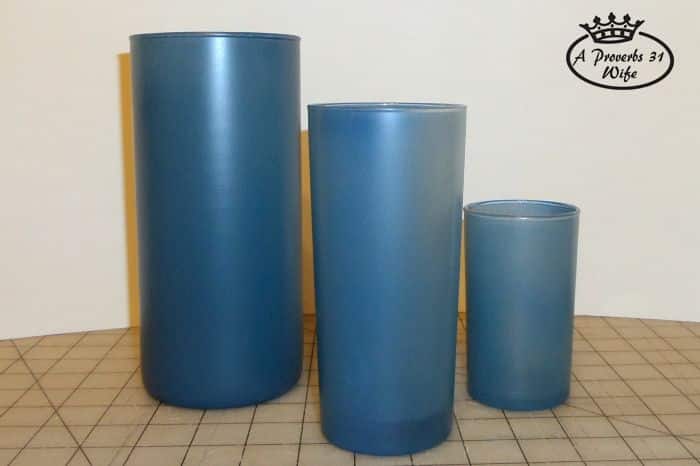
1. Spray Paint the Vases
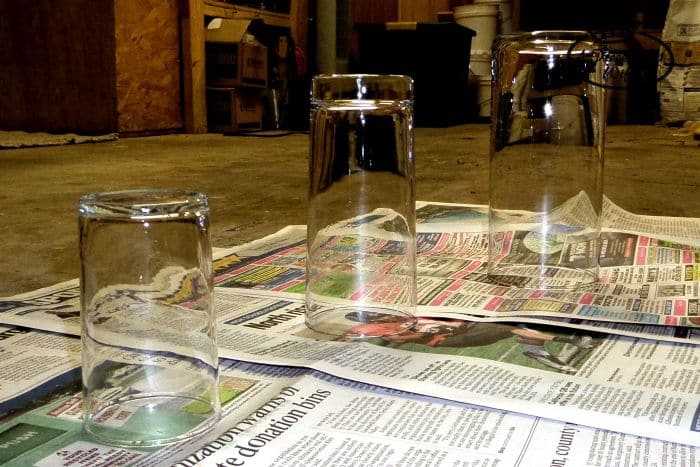
Wash the glass very well in super hot water and then dry quickly with a clean towel. Right before I painted my glass, I wiped them down with alcohol to remove any residue that may be on the surface. I placed them upside down on newspapers and got ready to paint.
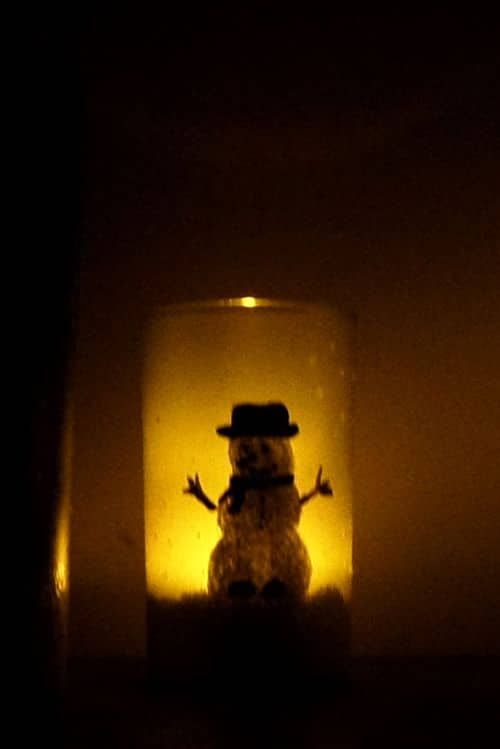
I found the painting part to be a bit tricky. You want a light, even coat of paint, on the entire glass. I struggled with the even part, and there were a few darker sections on my largest vase. 2-4 Light coats, are what you will want to shoot for when doing your spray paint. I would place a tea light in each vase, between coats to see how it looked. I wanted the jar to light up well, but wanted the candle and flame to be blurred.
2. Painting the Snow
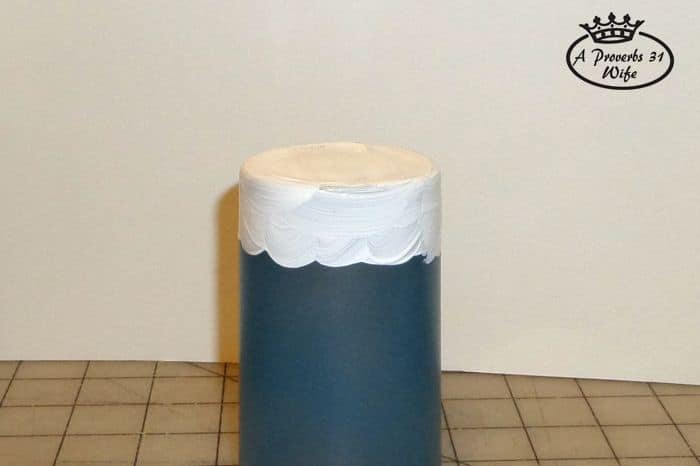
Once the illuminaries are painted and dried, it’s time to paint “snow” on them. I used a brush to get a good, thick, first coat, on the bottom of the glass. Once the paint became slightly tacky, I took a sponge pouncer and more white paint and lightly spounced over the surface to give it a nice textured look.
In order to get the paint thick enough, I did 2 more coats of paint to the bottom; applying these coats with just a pouncer. I then painted the snowmen with brushes and then spounced 3 coats, just like I did with the base snow.
Clearly, I am not the greatest artist in the world. I mean, my 10 year old brother is better than I. However, I’ve never seen a perfect snowman in real life, so I didn’t stress too much.
3. Decorate Your Snowmen
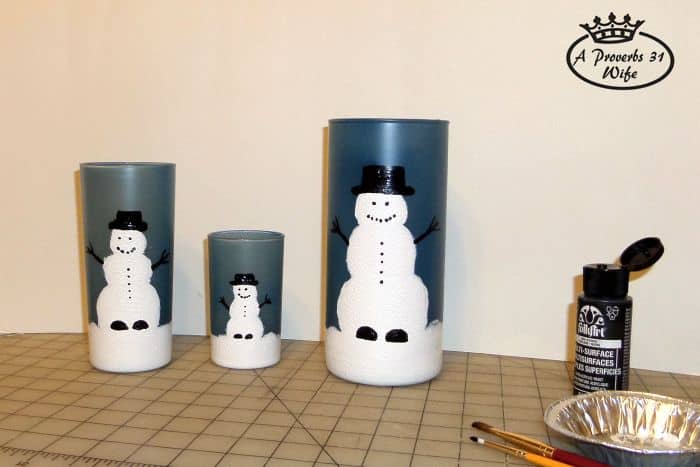
I used a wider brush to paint the hat, and boots. Then I used a fine pointed brush to make the eyes, mouth, arms and buttons. I only needed one coat for this.
Next was the orange carrot nose, and since I had a rose colored paint on hand, I used that color for the scarves.
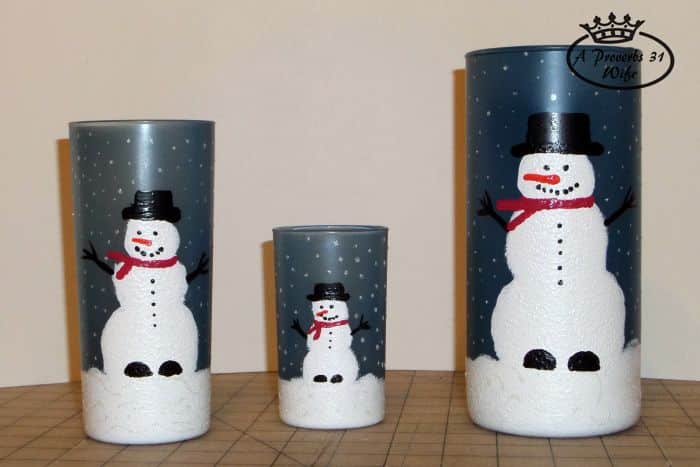
As a final touch, I took my glitter glue and made a few swirls in the snow at the bottom. Then I dotted the blue to make it look like it was snowing. They were really cute before I added glitter, but they are perfect now. You really just cannot go wrong with a little bit of glitter. 🙂
I will be giving these to my grandma this weekend when we have our family Christmas gathering. They will fit in just perfect with all of her other snowmen decorations. 🙂
I’m going to make some more of these. But I may paint something other than snowmen on them. Think of how cute it would be to paint a child’s profile and make an illuminary like that? You could also make snowmen illuminaries on mason jars. Really, with paint and creativity, you can do a lot!
 dec
dec