The Ultimate Parent Hack For iPhones and iPads
For the longest time, I refused to put movies on my phone because I would hand the phone to my child and end up with half of my apps deleted, several silent voice mails left for family and friends, and 3,497 pictures of his nose. I kept thinking…”If only I could lock him in while he watched a movie or used a kid-friendly app, I would totally be down with him using it”.
 Yes…that is my toddler using an iPhone up at the front of church during his Aunt’s wedding…
Well my friends…it’s possible. I’ve been using the Guided Access feature on the Apple products in our home for about a year now, and have shared my parenting gold with friends and one recently asked if I had shared it on Simply Real Moms. I hadn’t. I have failed you, and I am sorry for that.
So today, I will teach you how to use Guided Access and tell you all about it’s neat features.
First. Great news? It’s built into your device. No need to download another app (another app that can be DELETED by your toddler!), it comes as part of the general accessibility features on all iPhones and iPads. Why the good people in the Apple store don’t share this info with you when you’ve got 2 kids hanging on your leg as you purchase your device is beyond me. It should be told to all parents!
Basically, it locks your phone or tablet into the app that is being used. The home button becomes merely a button that doesn’t work, and the volume and power buttons no longer work as well. You can also lock out any part of the screen you wish to keep your child from touching…my FAVORITE feature. You choose areas of the screen that you would like off limits, and the phone locks them along with all the buttons! This is exactly what I need when putting a movie on for my kids. Not only can they not get out of the “videos” app, but they also can’t mess with volume, switch movies every 3 minutes or skip around the movie!
Alright, have I talked it up enough? Ready to implement this awesome feature on your device? Here’s how:
1. Open Settings
2. Open General
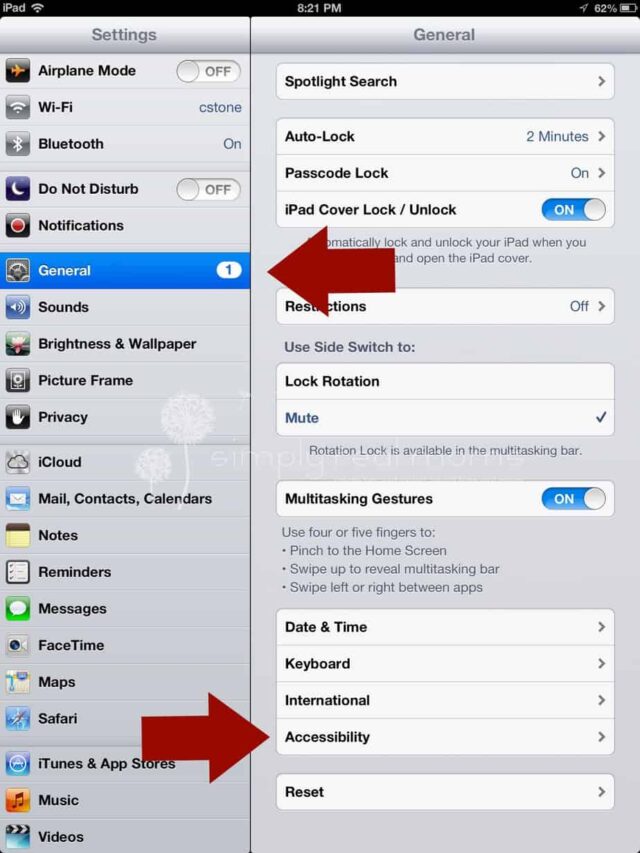
3. Open Accessibility
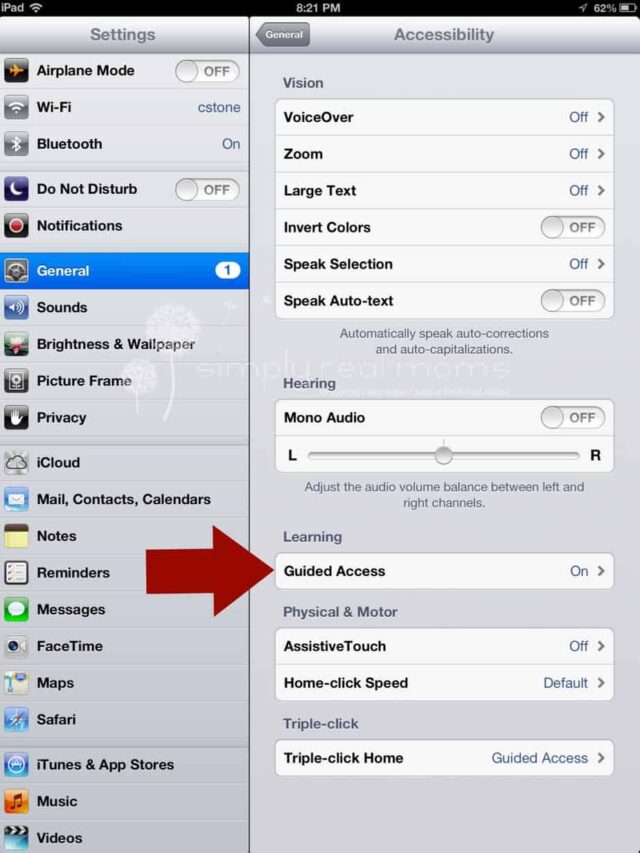
4. Scroll down and open Guided Access
5. Switch Guided Access “On”
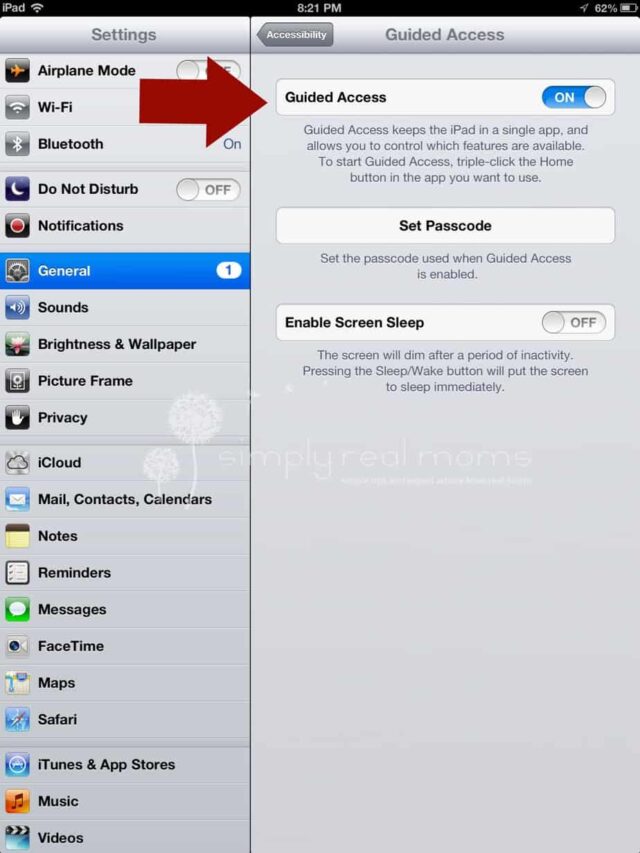
6. Create a password for you to control it
DONE. Guided Access can now be used in your apps!
While in an app, to turn it on you simply hit the “home” button three times. It will bring up a screen like this: 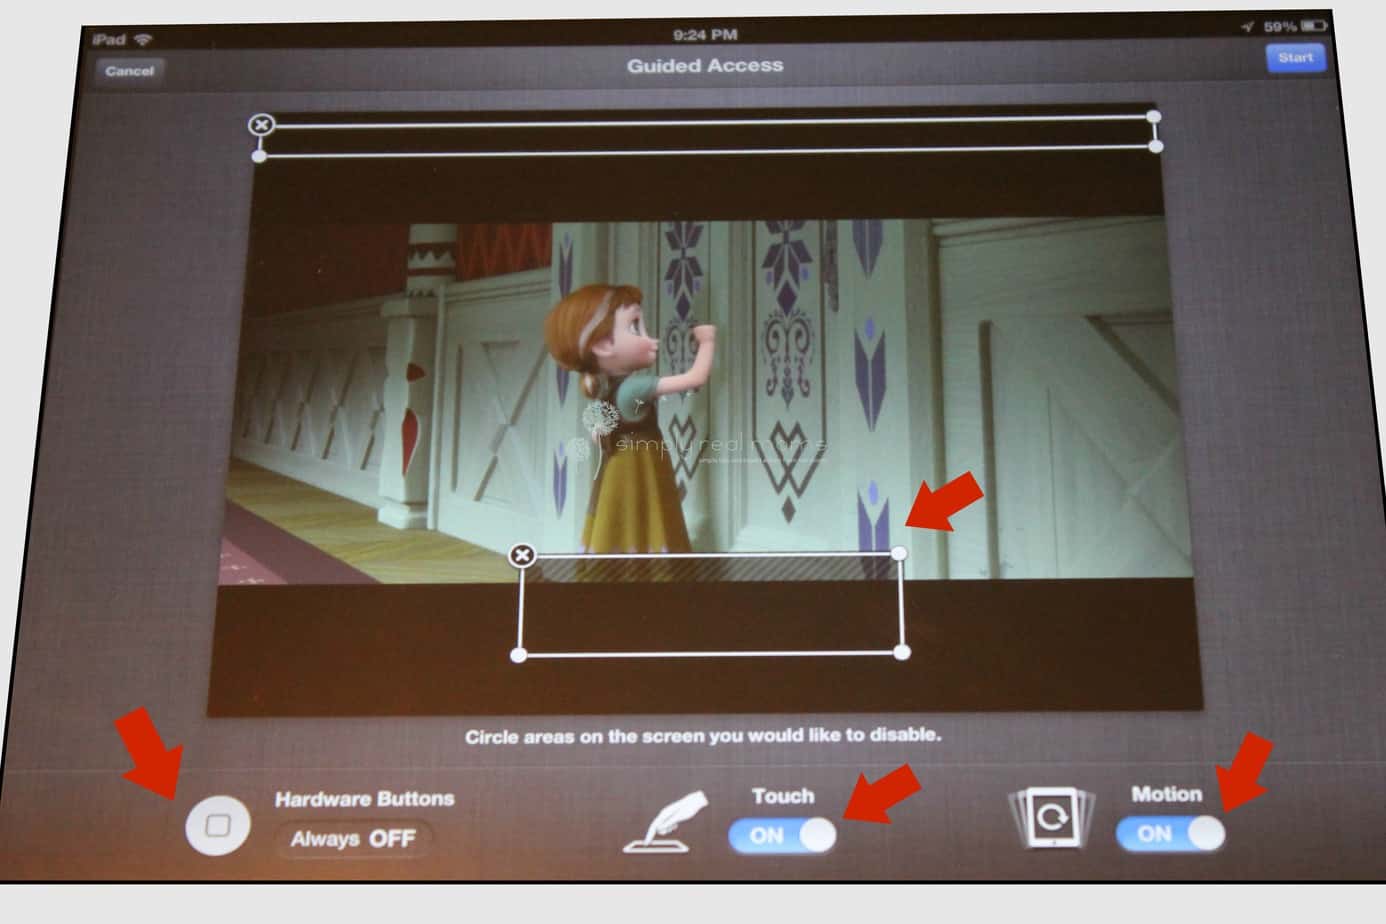 You can circle the areas you want locked out on the screen, OR choose to turn off the touch ability on the screen altogether! You can also choose to shut off the screen turning ability as well. I always do this while the kids use it for movies, because I found that if they turn the screen, it changes where the controls are and they can then touch the exact features I had just locked out! These features appear in the main guided access screen for some devices, and in a separate “options” screen on others.
To turn Guided Access off, simply hit the home button three times, enter your password and viola! It’s back to being your regular old iPhone/iPad!
This feature has saved my sanity in stores, on car rides, and during phone meetings when I need my kiddos preoccupied enough that they won’t fight.
YOU. ARE. WELCOME.