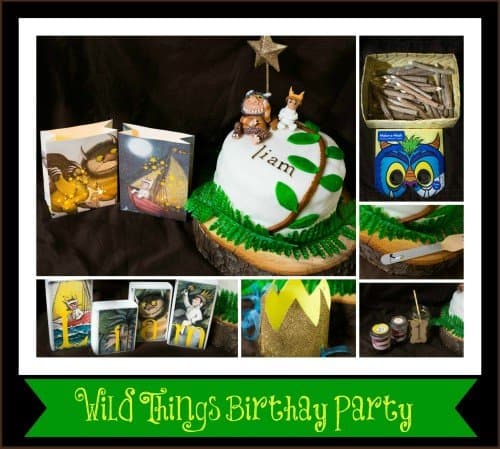
Where The Wild Things Are Birthday Party
I’ve been planning my sons first birthday since before he was born, okay; to be honest it was actually before he was even conceived. I had this vision, if I had a boy what his first birthday party would look like and almost two years later I was able to bring my visions to life. First birthdays are important to me for many reasons. One very important reason, we made it a year! I mean “we” made it a year as a team. I nursed him for a year, I shared my bed for a year, I have not slept through one night in over a year and I want to celebrate too!
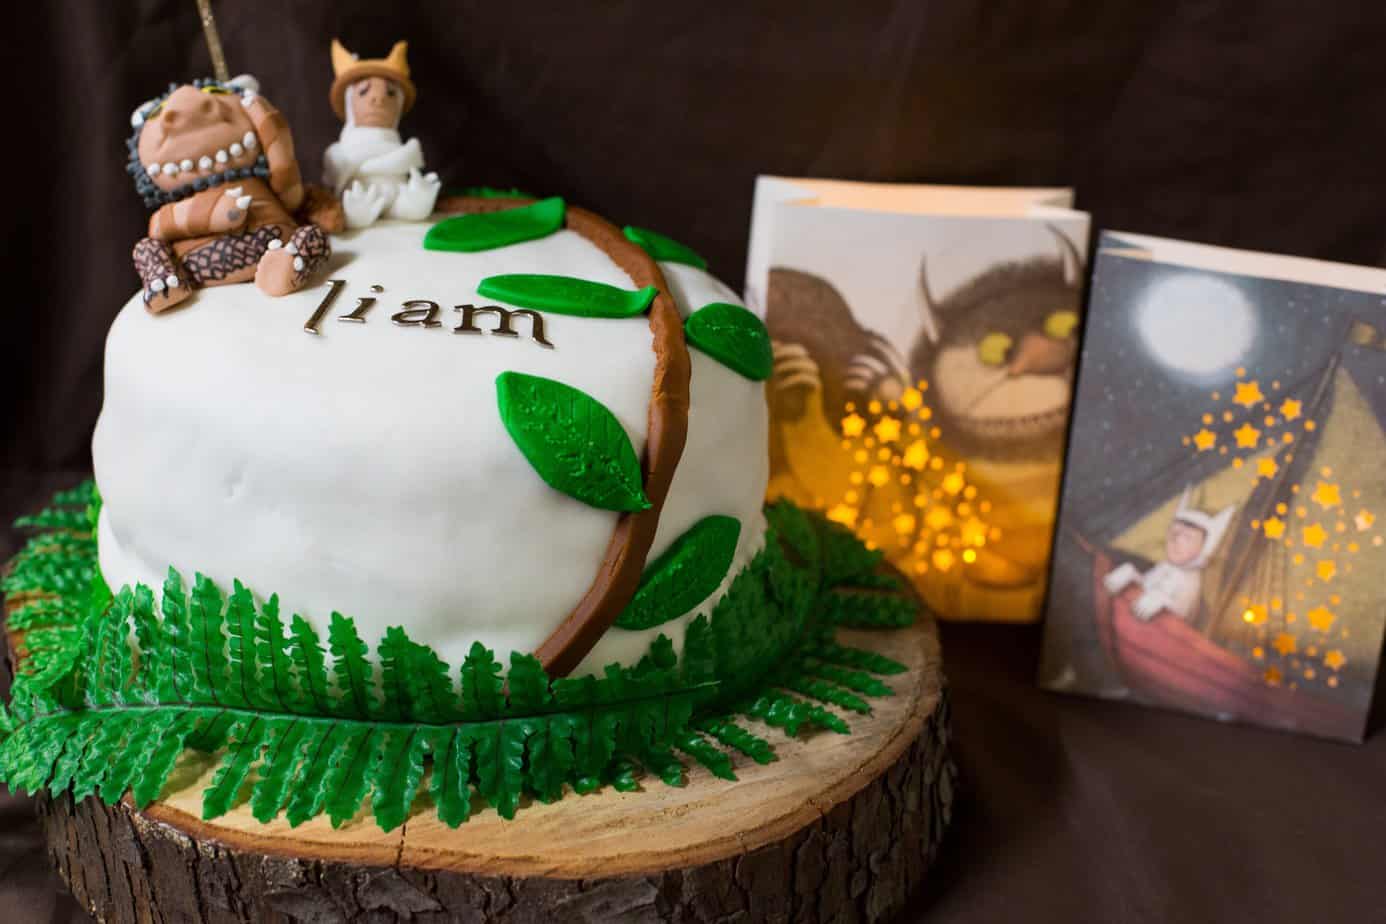
I am very excited I can share with you my “where the wild things are” party designs and details! To achieve the look I was going for I chose neutral colors, bright yellows and whites. I created a cake riser with a tree stump piece my neighbor had cut for me to fit, and it was perfect!

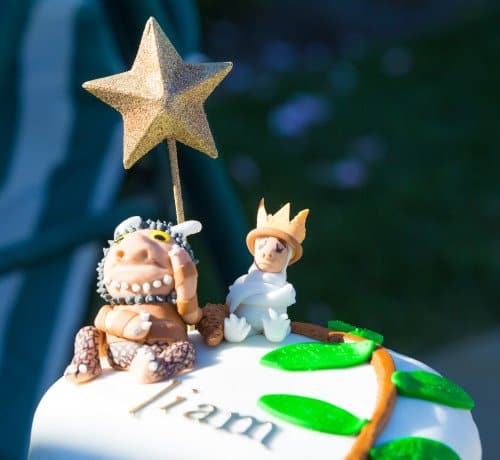
The cake was made out of a box cake mix and homemade fondant with gel food coloring. The awesome cake topper on the top of the cake was designed and sculpted by Auntie Cake Cakes. The cake topper made a huge difference visually with this cake. I would normally of used a small toy as a cake topper but because “wild things” is not the most popular, it was very hard to find. The cake topper really brought the cake together.
- 8 ounces miniature marshmallows (4 cups not packed, or half of a 16-ounce bag)
- 1 pound powdered sugar (4 cups), plus extra for dusting
- 2 tbsp water
- Food coloring or flavored extracts, optional
- Mentally prepare yourself, this is messy!
- Cover your table or cutting board with either powder sugar or Crisco (this keeps the marshmallow from sticking) Then pour 2 cups of powdered sugar over the space you will be working on.
- Place the marshmallows and the water in a large microwave-safe bowl. Microwave on high for 1 minute, until the marshmallows are puffy and expanded. Stir the marshmallows with a rubber spatula until they are melted and smooth. (make sure you dip your spatula in the Crisco as well so it does not stick) If some un melted marshmallow pieces remain, return to the microwave for 30-45 seconds, until the marshmallow mixture is entirely smooth and free of lumps.
- Once marshmallow is melted you will then pour it over the 2 cups of powdered sugar. At this point you will want to lather your hands in more Crisco so that the marshmallow does not stick. Continue to knead the fondant until it smoothes out and loses its stickiness. Add more sugar if necessary, but stop adding sugar once it is smooth–too much sugar will make it stiff and difficult to work with. Once the fondant is a smooth ball, it is ready to be used. You can now roll it out, shape it, or wrap it in cling wrap to use later.
- If you want to add coloring or flavoring to your fondant, I would recommend the gel coloring. I was able to find this at my local Michaels craft store. You also might want to wear gloves to avoid getting food coloring on your hands during this step. Add your desired amount of coloring to the center of the fondant, and fold the fondant over on itself so that the color is enclosed in the center of the fondant ball. I recommend using a toothpick to add a little bit of color at a time until you get the desired look. Once finished your Fondant is ready to use! If you are not using right away, keep rolled up into saran wrap so it stays nice and fresh. Homemade fondant is the way to go, it is yummy and pretty simple to make.

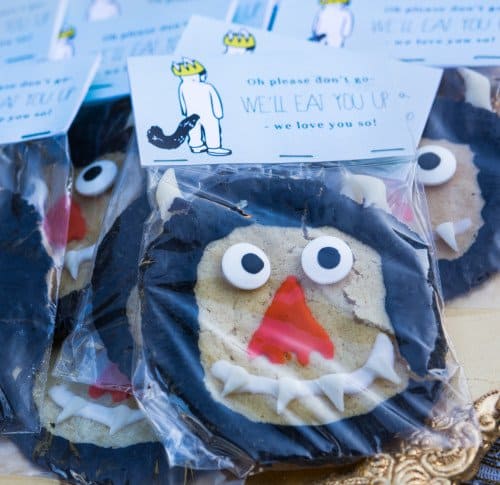
For Party Favors we stuffed Burlap sacks with different candies and treats for each child. We decorated a large bird cage and used it to keep all of the goodies in until the end of the party.
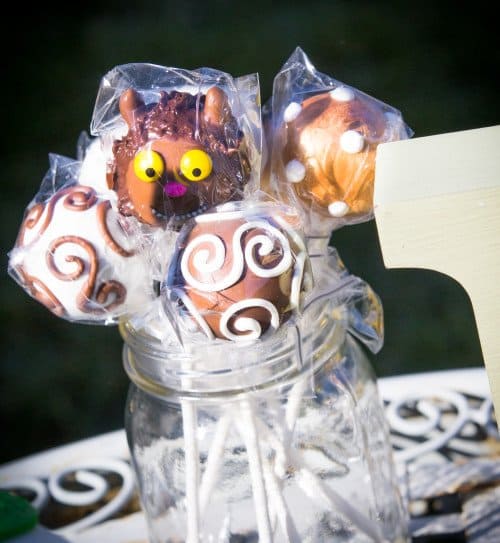
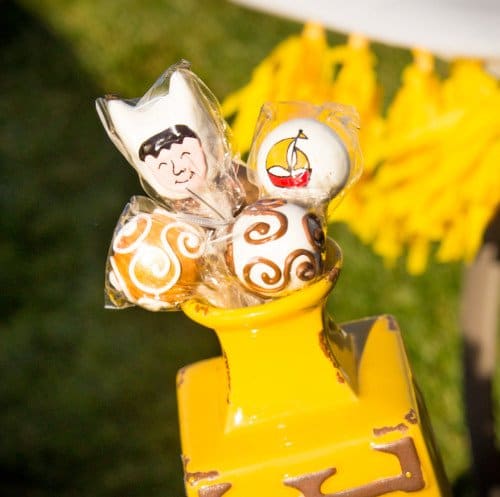
These amazing cake pops were made with spectacular detail and they were delicious. Hand made by Becca over at Sweet Whimsy Shop and packaged so very carefully so they stayed fresh and intact the entire way from Knoxville, TN.

This awesome centerpiece we made out of a cake stand, fake plants from Michaels craft store, a few rocks from my backyard and my daughters “wild things” doll to top it off. The Personalized Wild things blocks were one of my favorite! They are made out of solid wood which was great because it happened to be very windy the day of the party which did not work out in our favor. You can order these custom blocks as well as many other designs over at Personalized Blocks.


I had such a hard time trying to make up my mind for desserts. I knew I wanted a large cake but I did not want anyone to eat it, I know i”m crazy! Like I said, I had this visual in my head I had to fulfill. So, that being said I could not decide on cupcakes or more cake pops for the kids. It’s a hard life when you have to choose between how you want to eat your cake. The next day I ran across a picture online of mason jar cupcakes, and that was it! These were so easy to make and they were lovely. I used my Babycakes cupcake maker which uses 1400 watts of cooking power and makes 8 cupcakes in less than 5 minutes, take that oven! I ordered 20 mini mason jars on Amazon with my 2 day shipping and layered each jar with 3 cupcakes and frosting in between.

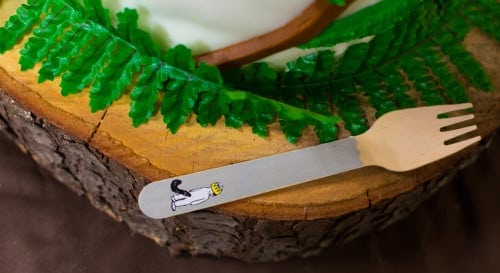
To add a personal touch to the cupcake mason jars we made, we added these awesome handmade wooden forks with the wild things designs on them made by Sugar Coated Studio. We attached one fork to every jar and tied it with jute rope which I was able to find at Hobby Lobby. Don’t forget to use a 40% coupon when you go, it comes in handy!


For the jars we added cupcake toppers which we cut to fit perfectly. Since we were not using cupcakes that these would of originally went on, we cut to fit the tops of the jars and they fit perfectly. These toppers were made by Top that Designs and were easily printable.
The mason jars with the number one were also super easy to make. I bought the pre cut card stock at Hobby Lobby and a number one stamp, the ink pad at the dollar store and used the left over jute rope from the cupcake jars and walah!
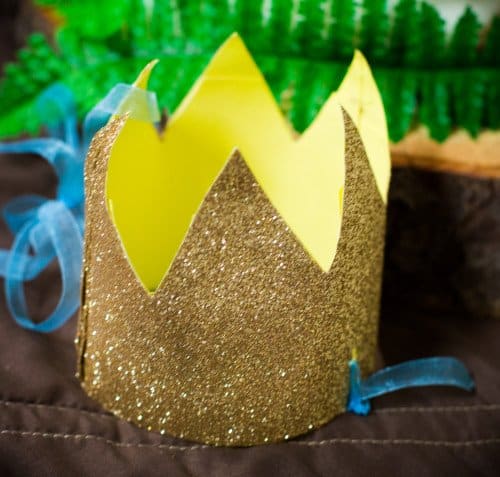
These amazing bedazzled gold sparkly crowns you can see near the cake were handmade by Ginny over at Peppermint and Swish. Unfortunately it was very windy the day of the party so it was hard for the kids to keep them on, but they did make a wonderful table decoration and complimented the Wild Things look we were going for. Ginny even included an emergency repair kit to go with all the crowns in case any lost their sparkle!

I tried my best to think of creative activities for all of the children at the party. I came across these Monster Masks online and they were perfect. I paired them up with a basket of wooden colored pencils that I found at our local HomeGoods store and the children loved them. Especially with Halloween around the corner, this was a hit!
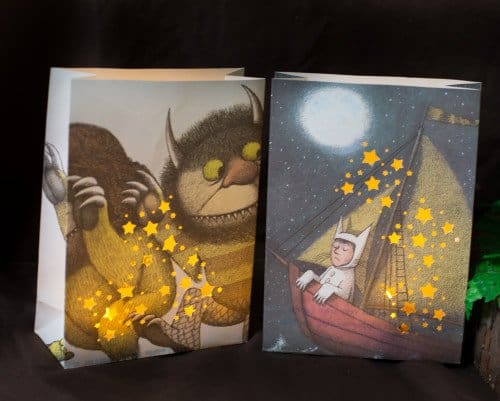

The handmade Luminaries were crafted out of paper with stars stamped out. I picked up a few battery powered tea lights at the dollar store and put them inside so they would glow. You can purchase these lovely designs at Olden Designs on Etsy.

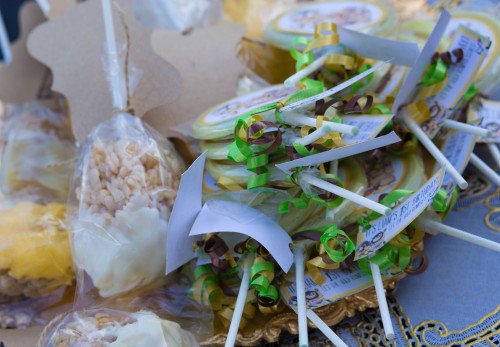

We made a ton of party favors, a ton! With the help of my mom and some creativity we had a combination of chocolate dipped Rice Krispy treats on a stick, sugar cookies with gold stars and chocolate lollipops.

With a few leftover mason jars I was able to make some pretty table top decorations for each table. I sprayed each jar with Gold Paint from Michaels and purchased yellow Sunflowers to go inside. These were very inexpensive and turned out very nice.

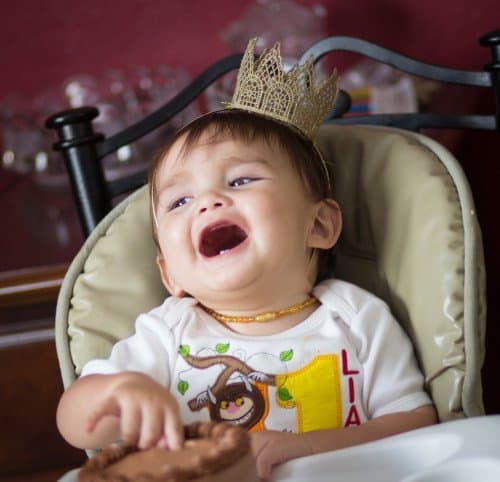
When it came time for cake, I had to have a mini one just for him. This small chocolate cake was purchased at my local Safeway and I bedazzled a number one candle to match. I think its safe to say by the look on his face he enjoyed it!
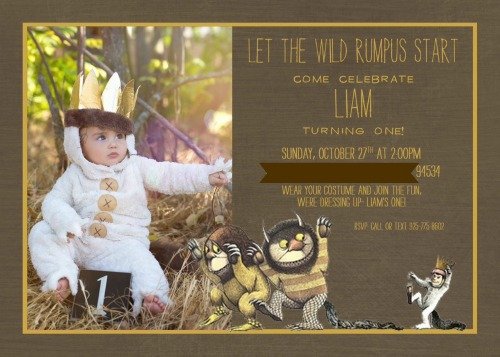

And lets not forget his “Max” costume. I purchased this online at Pottery Barn Kids. The quality couldn’t of been made any better! It was so true to the story and looked exactly the character. Honestly, I was a little jealous they did not make them in my size, it looked so comfy. We did luck out that Liam’s birthday is the day after Halloween, so we were able to get our money’s worth out of the costume, they are a little pricy.
If you are on a budget or can’t find the Max costume to purchase, we have an amazing and easy tutorial on how to make your own Max costume. Check it out HERE.
Though this party took literally weeks to plan, design and bring everything together for the final day, I was really pleased with the results. I do wish the weather would of been a little more in our favor but it was a sunny day in October, so I can’t complain too much.